Congratulations!
You’ve gotten your first report request or SQL homework assignment! You’re anxious to get started just hacking SQL in a developer window. But any experienced developer will tell you to slow your roll. There’s a bit of planning you will need to do until you know the table specifications like the back of your hand. As an example, in Higher Education, the Ellucian Banner DB has in the neighbourhood of 13,000 objects, developed over decades with different lead developers and data structure paradigms.
Things you’ll need:
- The report specification or assignment. This will likely very wildly in level of detail. Usually these are developed by an Application Analyst, someone who bridges the gap between the Functional users (your customers) and the developers (YOU). A GREAT report spec will already be detailed with tables, columns and constraints. Just as often, you will get just a vague functional description in a giant approval document.
- A Blank notepad or sheet of paper to keep notes.
- A session of TOAD, SQL Developer or your favourite development tool so you can check the columns, indexes, and see what the data looks like.
The request:
“Get me the name, address, and amount paid for every student who paid an Athletics Fee this term.”
(This is a little too topical since with COVID disruptions many schools had to issue refunds. This example will be a high level example, not using real field names, though tables might be actual tables in Banner.)
1. Decide on a ‘Driving’ table. This will be the foundation of your query.
- This can be the table that has most of the fields you need (most of the SELECT clause).
- May be the table that allows you to specify the most constraints and so you can quickly specify your population (most of the WHERE clause).
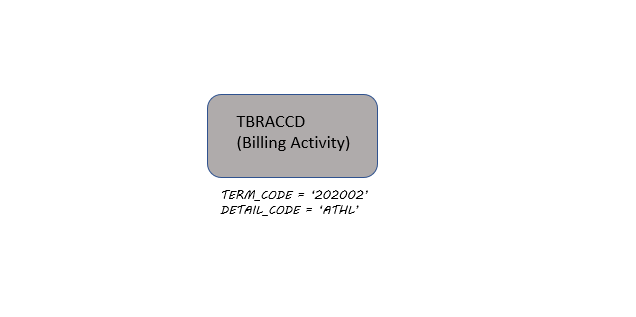
Looking into your institutional Data Dictionary, the assignment documentation, or just asking a more senior co worker what tables you may need you can start looking at the table descriptions. You will look up the Identity table (for their name and student ID), the Address table (for their address), and the Account Detail table (for payment information). Looking through all of those, we’ll start with the Account Detail table, because it contains both one of the fields we need (SUM of amounts paid), and also because we can specify a bunch of the constraints on that table. Specifically that the payments need to be for Athletics Fees, AND we can specify the term all on this table!
You can start sketching out the query by putting that first table down.
2. Add more tables to allow you to specify your population (constraints/WHERE clause).
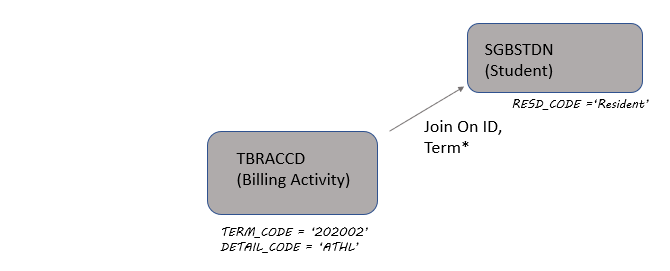
We really lucked out there, in that all the constraints that we needed were all in that one table. But what if our functional team came back to us and said, “We need to handle refunds for instate vs out of state differently. Can you only pull In State students?”
Checking, we find that the ‘Student’ table contains the residency code. So we can add that into our sketch for our query. You can note that constraint on that table under the Student box. Looking at the table description we can also make notes on the arrow joining the two tables with the columns we need for the join, in this case ID and TERM.
3. Add more tables that have fields you need.
Now that we have our population of students specified, we can start adding any other tables we need for additional fields such as the Name and Address from their respective tables. As you add more tables it will start resembling a hub and spoke, with the ‘Driving’ table as the center hub. You might find that you need to join through two tables to get a field you need. This is all normal.

If you’re thinking about it you can also note if the joins are inner or outer joins on the arrows! Remember they act differently and will change the results a LOT. We’ll be talking more about that in the lesson on the WHERE clause.
That’s it! We’ve finished our initial design! You’re ready to start building the query with a solid plan in hand. There will always be some experimentation and research needed, but you will have the structure laid out to help keep you on target. Next up we’ll looking at each part of an SQL query and the most common problem you will likely have for each.
Summary!
- Decide on your DRIVING table. Either providing most of the fields or allowing you to add the most constraints!
- Add more tables to your query that you need to get the right data! (WHERE Clause)
- Add tables that have the columns you need for the report, but don’t change the population.
TIP: Remember, Inner vs Outer joins act differently.
PRO TIP: Run the query after adding every table. If you create the query in the same order, you can do a quick sanity check by doing a row count every time you add a table to your query.
- The total population should DROP every time you add a table in Step 2.
- You KNOW you’ve done something wrong if you add a table in Step 3 and the count changes!
See you next lesson Data Ninja!